Snowdrop Box Card

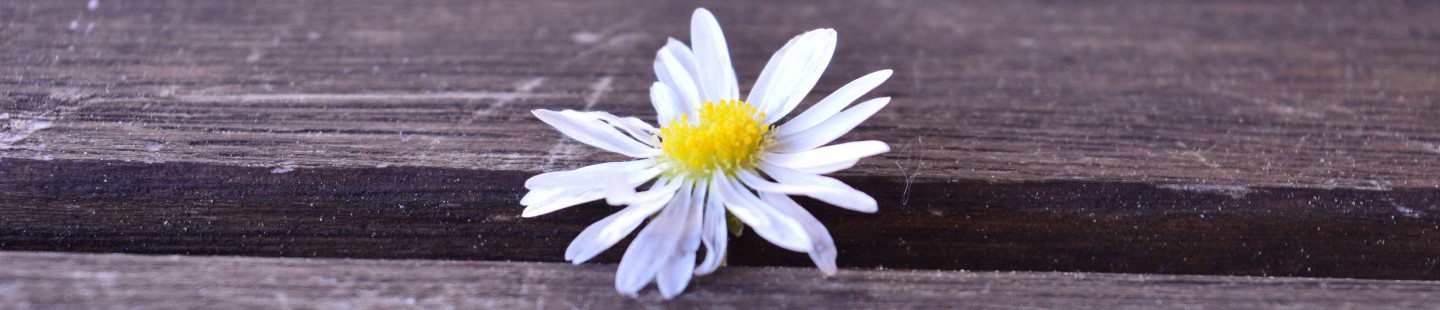
Here in Denmark, the first bringers of Spring is among Eranthis and Crocus the Snowdrop.

This little white bulb flower usually pops up from the dirt when the sun melts the snow (IF there’s been snow that is) like the other early Spring flowers, but this one really looks like a fairy dress to me. So delicate and beautiful – clearly my favorite!

vintergaekker-planteleksikon

As I was considering making the Orchid Box Card from Simply Crafty Svgs, I loaded the files into my Silhouette Software and started to organize the parts – as I usually do when starting a new project. That’s when I discovered it.

I noticed that I could bend one of the crown leaves of the Orchid and make it look like a Snowdrop and from there on my mind did it’s thing.

I started pulling on some of the edit point on the leaf to make the two outer parts a bit longer and more pointy. I also edited the small flower buds a bit to make the round end a bit more wavy. Finally I edited the flower stem + the one on the insert to remove the leaves.

Vintergæk box kort3

The leaves are also edited to be slimmer and longer as Snowdrop leaves are 🙂

Vintergæk box kort1

It makes more sense looking at the picture 😀

Adorable right? I doubled the stems – one of each side of the insert and doubled the flower as well to make it look more dimensional.

Then I just added the leaves to the insert and there it was 🙂

I used AC Cardstock and DCWV patterned paper from the Samantha Rose Stack. I really love the way the foiled paper looks like snow melting on dirt. For the edges I used Distress Ink. The sentiment on the card reads “Congratulations” and is made with the Print and Cut option.

Vintergæk box kort2

So now I have two options when making the Orchid/Snowdrop Box Card 🙂

Vintergæk box kort4

Let me know what you think in a comment below – I would really love to hear some opinions.

Thanks for dropping by today ❤

One Thing Led To Another…..

Having an idea of making one thing, very often leads me to other ideas.

It’s just how my brain works. Filled with thoughts, ideas, music, talk….etc. Most people know this from themselves but sometimes mine spins a whole lot faster and I really need to grab those ideas when they’re there – otherwise they diminish into oblivion forever. The big black hole as I call it 😉

This time I had set out to make an Iglo as I noticed Simply Crafty SVGs didn’t have one yet.

Not being the great math genius, I figured that a few files had to be combined for this to happen so I started searching the site and settled on elements from the Dog Dish and the Leprechaun Hat.

I took the bottom piece from the Dog Dish and the top part from the Hat and glued them together……only to discover that they did NOT make a Iglo shape.

But looking at this odd thing I had made, sent my head in a spin of ideas and here’s a few of them:

Bucket Hat or Cloche Hat:

Hat

It’s going to be to difficult to explain exactly what I did to get to this but as mentioned before I glued the two shapes from the files together and then I added panels.

These were also made from the same two files – simply by using the welding tool in the Silhouette Studio software.

How to 1

A little tweaking with the edit points and voila….perfect panel.

I used AC Cardstock and patterned paper that I printed from the Silhouette Design Studio (ID #255448 by Miss Kate Cuttables). I also added Glossy Accent from Ranger to the dots of the flowers in the paper.

Then I tied a ribbon around the hat and added a few flowers. It’s cute right?

The little Groovy sentiment/tag is from the Silhouette Design Store ID#13856 and I added a group of flowers matching the paper from Miss Kate Cuttables also from the Store ID#251605.

Next idea was given to me by a friend that saw this shape as a Blue Bell Flower:

Bordkort

I downsized all by 50% and changed the panels slightly to have a curvy bottom (no pun intended)

Again I played with the different tools in Silhouette Studio:

How to 3

To get the curve, I used one of the flowers from the Hollow Easter Egg and then I welded this cut-off piece onto the panel I made before:

How to 2

And ta’ daaa….now the panel works as a flower petal 🙂

Further more I made the top leaf out of one of the roof pieces from Spring Egg-Centric House:

How to 5

This was done by pulling and pushing on the edit points. Amazing how it can go from one shape to another 🙂

I glued that on top of the flower and cut a small slit into it to fit a name tag and now it’s a place card.

I really like this one ❤

Well…..I could go on with ideas for this shape like a Storm Trooper Helmet. But I didn’t have the patience to make that one 😉

Instead I pursued my original idea and made an Iglo but this time with the top part of the Sailor Hat:

Iglo

I used a shape tool to make the entry way but other than that it’s the same.

I used AC Cardstock and Best Creation Glitter Paper which I embossed with a brick patterned embossing folder. Not exactly the right folder, but that was what I had at hand.

I’m not going to go into details on how I struggled to make a bottom for this Iglo (and realizing that a such already existed o.O) but I’m not entirely satisfied with this Iglo. I will keep at it until I make one just right unless Sandy does the work for me 😉

Thanks for taking the wacky journey with me today. Phew….It’s kinda exhausting having this nut of a brain but also a lot of fun 🙂

Hope you’ll join me again soon ❤

Chestnuts Roasting……

Today I’m going to show you something very different from what I had prepared.

Go figure! I’ve had my eye on this Christmas Fireplace from Simply Crafty Svgs for a long time. Ever since I saw it on the draft board among other designs and I instantly knew THAT was going to be a Christmas project.

So when this was released I got busy…..REALLY busy! Barely got home from the Gym today 😀

Billede 05

I’m totally in love with this cool giftbox. Especially because – well it’s a box but also because of the awesome fireplace that lits up by a LED tea light. Such a brilliant design!

Billede 06

I made mine with AC Cardstock and patterned paper from DCWV Stack Red&White Christmas and Recollections Paper Pad Wood, Marble and Brass.

I also used a bit of vellum for the flames, that I colored with Distress Ink.

The wood logs are embossed with a wood grain embossing folder from Darice and the panels on the Mantel are embossed with an embossing folder from Sizzix.

All edges are inked with matching Distress Ink and I added small gems on the cute bows on the garland.

Finally I added a bit of Stickles on the fuzzy top of the Stockings.

I do think this is a keeper. If only I can find a spot for it 😀 Otherwise I may have to make this again in a downsized version.

Billede 04

Thank you so much for joining me today. I will show you the original intended piece another day soon.

Advent Gift Box

Most of us know and love the Christmas Countdown Calendar. The exiting and magical feeling when opening a new door every day and unwrapping the gift or piece of candy inside. Yes, I still do that 😉

In Denmark we also count the 4 Sundays before Christmas – Sunday in Advent and for some this is when they get their present. In my home my kids get to chose if they want a small thing every day until Christmas or something larger every Sunday. They’ve gone with the latter 😉

I thought that when bringing a hostess gift along when visiting friends or Family this November, it could be a Advent Gift Box and I found just the things for it at Simply Crafty Svgs.

DSC_0006

This is the Square Candy Box. Just the perfect size for my idea 🙂

I made it with AC Cardstock in Slate, White and Shrimp along with patterned paper from DCWVs Merry and Bright stack.

I needed inserts to divide it into four, so I simply adjusted the inserts and added two more to put my small Curved Treat Boxes (freebie) in.

DSC_0010

I used the Foil Quill and cobber foil for the numbers (Silhouette Design Store ID #105652 by Sarah Hurley) and tied them onto the small boxes (downsized to 70% to fit all 4 on one piece of cardstock)

Inside the treat boxes I hid the treats 😉 Yummy chocolate from Danish Royal Court Supplier Anton Berg.

DSC_0003

The last thing I want to mention is the twine used to wrap around the box and the small tag that I cut out of the DCWV stack.

This surely is a bold color for Christmas but I love it and I bet whom ever gets this box is going to love it too.

I’m so sorry for the quality of the pictures but it’s practically impossible to get good lighting here in my new townhouse this time of year and I still have to get myself some professional lights – when that million bucks lands in my mailbox 😉

Thanks for joining me today. So much fun to begin the Christmas crafting. I have soooo much I wanna make and soooo little time 😀 How about you? Have you begun your Christmas crafting yet?

Acorn House

Gone is Summer. Gone is Halloween. Soon Fall turns into Winter and before we know it, it’s Christmas.

I’ve packed away my Halloween decor to make room for Christmas and soon I will pack away my Fall decor too – but only because I haven’t got room for it. Lots of the Fall decorations can easily be used for Christmas. This cute decoration I just made definitely can!

dsc_0002 (3)

This adorable Acorn House from Simply Crafty Svgs, is one of the easiest houses I’ve ever made and still is darn cute.

I made it in the original size – very unlikely of me 😉 It’s cut on my Silhouette Cameo and I used the Solid Scorelines option. I’ve started doing that most of the time unless it’s something very small. Then it can be a pain to fold 😀

I used AC Cardstock in Coffee and Chocolate along with patterned paper from DCWVs “Cider Woods.” It’s difficult to see but the paper for the bottom is copper foiled acorns 😉 So I took a close up:

IMG_5188(Edited)

All edges are inked with Distress Ink from Tim Holtz and I used gold Vellum behind the windows and door.

The door knob is a copper colored enamel dot and I tied some raffia around the stem and added the cut-out leaves plus some small berries from my stash of nature materials.

Lastly I added a string of Fairy lights inside – the glow is fantastic ❤

Oh how I love acorns – and I usually use them to decorate for Christmas too along with pine cones and pine branches.

Well that was that – now it’s time to concentrate on Christmas 🙂 I have a lot of things I want to make and I bet I can’t fit them all inside my house 😀

Thanks for joining me today – have you started your Christmas decorating yet? Let me know in a comment below


Coffee…Coffee…COFFEE!!!

Ever felt that craving, the need – the MUST HAVE?

For coffee that is 😉 Oh dearies – I feel it everyday! And I especially felt it when seeing that awesome Percolator that Sandy of Simply Crafty SVGs put in her store last fall.

I have seen many editions of the Percolator made and each and everyone made me thirst for my favorite drink. So I decided that while sipping a Café Latte, I would make my own.

DSC_0002

I chose to make it realistic but tiny (due to lack of storage space). So it’s downsized to 50% of the original.

It’s made from AC Cardstock in Charcoal and Black and decorated with Silhouette Printable Foil in Silver.

And it’s very tiny – only a bit taller than a Stickles glue 😉

I found the tag in a 6×6 paper pad from Echo Park – “Coffee” Collection – it just fit so well. Another could be: I’ll take my coffee black as my soul 😀

DSC_0007

So easy and fun to make – still thinking of other ways to make it and might be doing so in the future. I’m a coffee addict – there I said it!

Thanks for joining me today – please let me know what you think of this tiny Percolator in a comment below and until next time: Happy Crafting ❤

Faux Wood Luminaries with Snowflakes

I seriously can’t think of a more beautiful thing than a snowflake. Perfect in every way and all different from each other.

This was my inspiration when making the new Snowflake 3D Luminary Tote Box from SVG Attic.

I made three – all with a different snowflake:

DSC_0016

They are made in AC Cardstock Light Kraft and decorated with AC Dark Kraft and Chestnut. The handles are made from Bazzill Bling Cardstock in Tungsten.

I downsized them by 50%.

The one in the middle is the original one, the left snowflake is found in the Silhouette Design Store design ID #36347 and the right snowflake is also from the Silhouette Design Store design ID #22593 – both a tiny bit altered.

These are tiny! I couldn’t fit a normal size LED tealight into them, so I went with the color-shifting ones. It goes without saying that the handle was a challenge in this size 😉

Thanks for joining me today – please tell me what you think of these in a comment below.

Have a great Sunday!

New to SVG Attic? Check out these awesome places!

Happy Snowman

The calendar says Winter and Winter equals snow…..at least in some places. We have only had a few flakes hit the ground but it sure has gotten cold enough for the white gold to make it’s glorious entry. Yeah it’s hard being a winter/snow lover in Denmark these days.

While still eagerly awaiting some heavier snowfall, I made this tiny cute Smiling Snowman from Simply Crafty SVGs.

dsc_0033

He is made from AC Cardstock in White, Chestnut, Black and Melon and decorated with Best Creation White Glitter paper and AC POW Glitter paper in Purple and Teal.

I downsized him to 50% of the original and that only made him cuter 🙂

I also made him a tiny lantern to keep him cozy in those looooong cold winter nights. It’s made from the Mini Hanging Lantern (freebie) and the Square Classic Lantern (the one with the cross windows).

dsc_0037

I simply added the cross windows to the Mini Hanging Lantern and then I shrunk it down a lot to make it fit in size for the tiny snowman. I also added a tiny LED light inside it.

Now he can keep me company while waiting for a Winter Miracle in the form of snow.

Thanks for stopping by – please come back soon  and also please leave me a comment below.

3 X 3 = Hygge

What is “Hygge”?

Hygge is a Danish word for coziness – for snuggling under a blanket, being with friends or Family or maybe just being yourself watching your favorite series in candle light, cuddled up in a warm blanket ❤

Hygge is definitely what comes to my mind when I see candles – being real or LED – and that is exactly what I’ve been working on for the last week. Not just one but 3 😉

Not just candles – they have to have something to stand on, so I made 3 candlesticks too.

Not just candles and candlesticks – I added a ring of leaves – or should I say 3.

Enough yapping – here they are:

dsc_0005

Candle 3D Chunky with Drips rests nicely on the Candle Stand 3D for Display with a alternated Candle Ring 3D Evergreens sandwiched between.

Let me start with the candle ring, as I made it somewhat different than the original.

dsc_0011

It’s made from AC Cardstock in Leaf and Kale.

I used my Silhouette software to remove the Evergreen sprigs from the ring and add Leafy Sprigs instead as I wanted a more Springy feel to the project. It’s all about daring to use different features in the Silhouette Software (I bet lots of other cutting software offers features like this) like Make or Release “Compound path”, Welding or editing Points. All in all just play around – you can’t fail cause you can always go back.

Then I made the Candle in AC Cardstock Caramel and inked the edges with Distress Ink in a light brown shade. The candle sure is easy to make! You just have to have your pieces organized.

dsc_0007

Finally I made the Candle Stand or Stick in AC Cardstock Vanilla and inked the edges with the same Distress Ink. This is also very easy to make and it is so sturdy!

dsc_0013

That’s it – times 3. Ready for Spring, Easter and Summer. You could add flowers to the rings for more decoration – I just like them the way they are.

Thanks for joining me today – please let me know what you think of this project in a comment below and have a super cozy Sunday.

New to SVG Attic? Check out these awesome places!

Let it Snow

Ahhhh January! Once a season full of snow and ice but now……grey, dull, warm and rainy. Uggg!

I really miss snow – sooo much. Knowing that a lot of people hate it because it makes everything slippery and cold, I still love how it lights up everything and dimming down all noise and sounds. I love the sound it makes when walking in it and I love the different beautiful shapes of snowflakes.

So with hope still intact, I made two snowflake projects I want to show you.

First of is the new gorgeous Snowflake Slot Form Swirls 3D Ornament:

dsc_0020

I made it in 75% of the original and used AC Cardstock in White and white glitter paper from Best Creation.

It is incredible easy to cut and assemble – just takes a few hours from start to finish and it looks so much like a wood ornament.

I do like to dab a little glue here and there so nothing accidentally moves and it remains super sturdy.

Next I made the 3D Snowflake Northern Cross Star from the JGW Snowflake Stars kit:

dsc_0010

I made this in it’s original size and it do require a lot of paper – but the result is just amazing!!!

I made it from AC Cardstock in White and Charcoal and decorated with white glitter paper from Best Creation and Silver Metallic paper from Tim Holtz.

dsc_0012

Seems like I want to light up everything, so I added holes in the different layers in the lid of the box plus one hole on the side of the box through both lid and base for the string of LED lights to come through.

dsc_0011

I also added panels of Silver Metallic paper on the inside of the base for the lights to reflect on, hoping for a greater light effect.

dsc_0002

Now I hope for some snow to match my new pretty snowflakes – if you have any to spare – just send it my way please.

Thanks for joining me today – hope to see you again next time.

New to SVG Attic? Check out these awesome places!